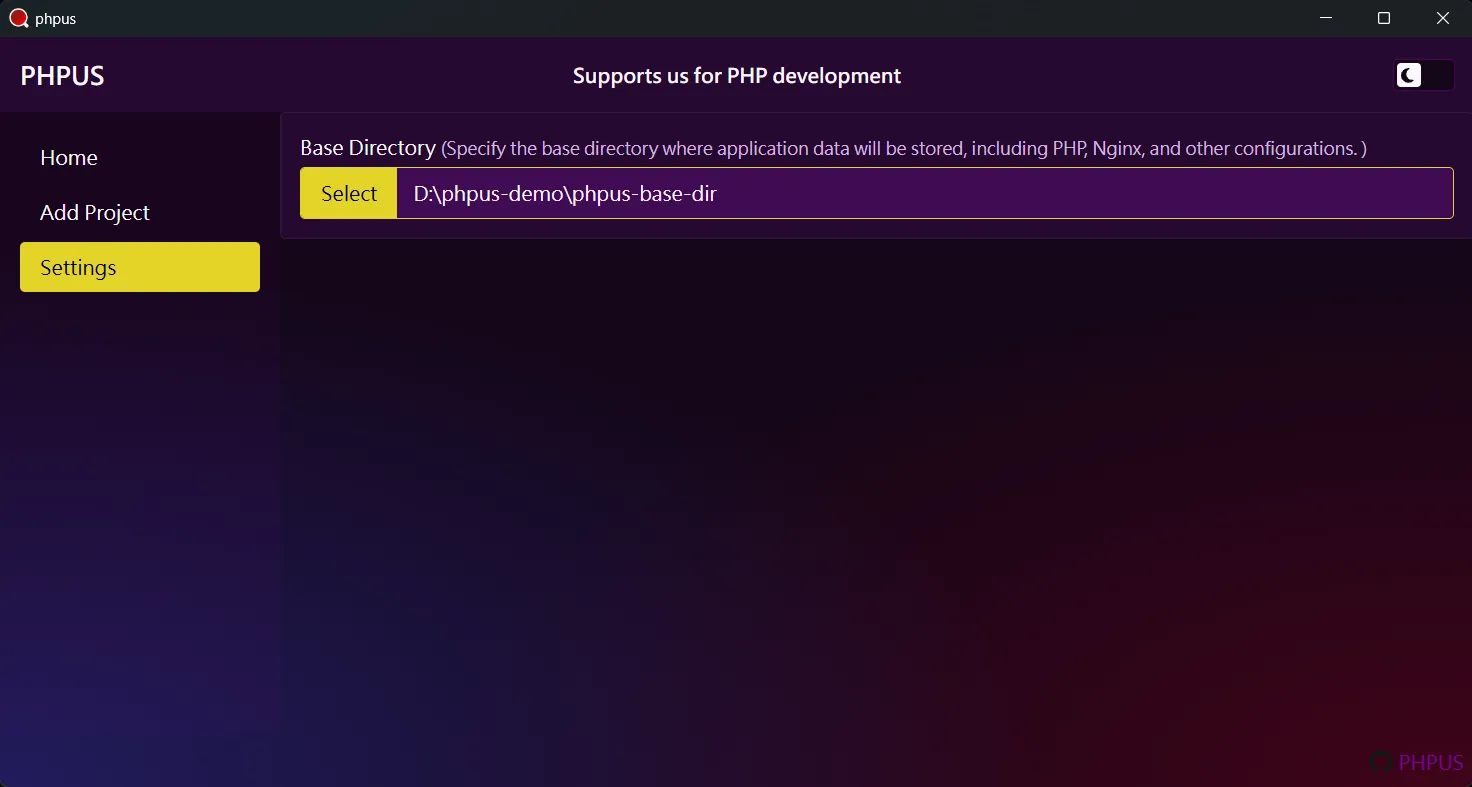
1. Set the Base Directory for Configuration and Installations
To get started, you’ll need to configure the base directory. Go to the Settings page via the left-hand menu and set the directory path. This location will serve as a centralized storage for all your configuration and installation files — including PHP versions, PHP extensions, php.ini, web server files, and related configuration data.
-
php: stores different PHP version installations -
nginx: stores different Nginx version installations -
data: stores PHP and Nginx config files, logs, and other files related to this application

If you haven't manually set a base directory path, the
application will default to using:
[PHPUS app path]/base_dir — located in the same
directory as the PHPUS executable.
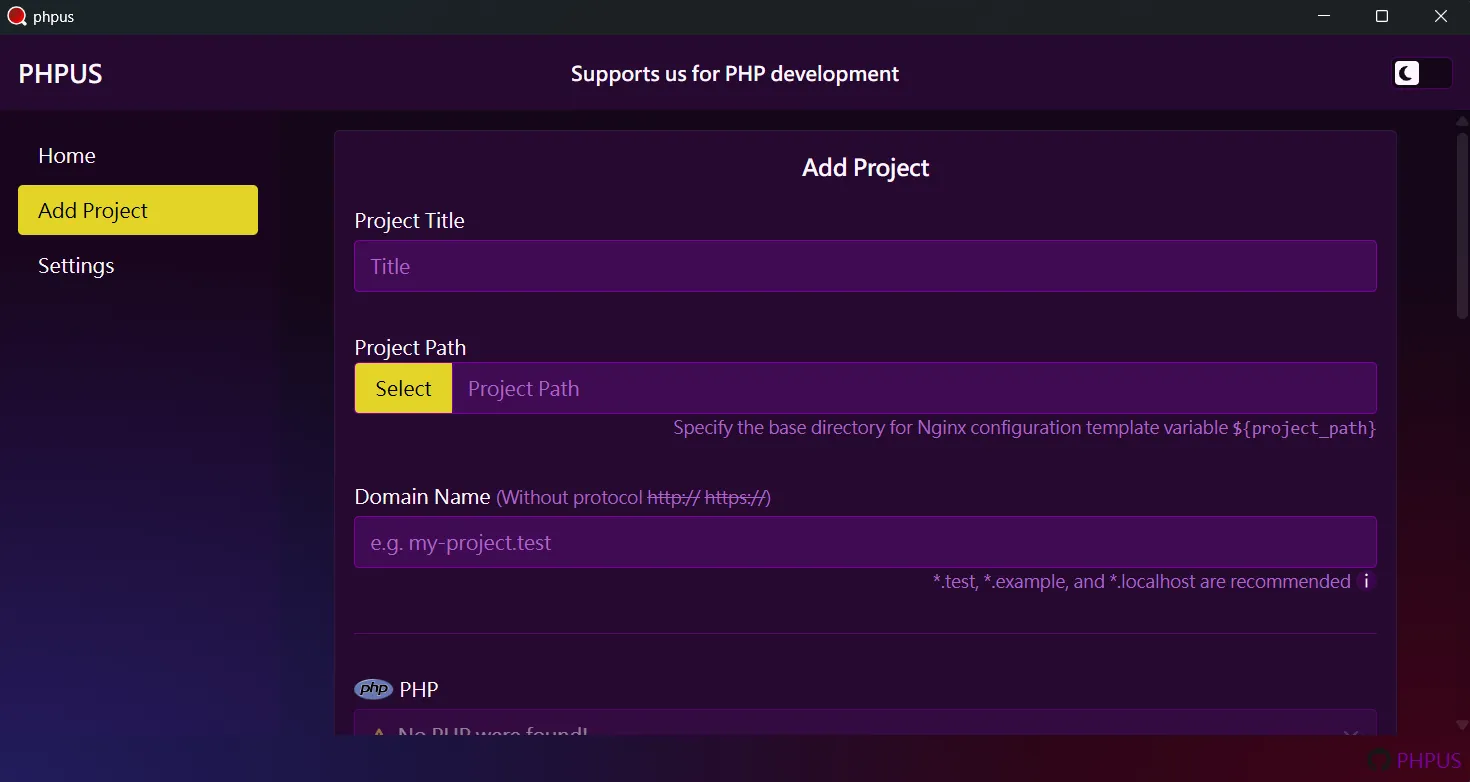
2. Add a New Project
To add a new project, click on the Add Project option in the left sidebar. Alternatively, if you don’t have any projects yet, you’ll see an Add Project button on the home page — simply click it to start.

For this guide, we’ll use a sample project cloned from GitHub: phpus-laravel-12.x-demo .

2.1. Enter Project Details
-
Project Titleis the name of your project. -
Project Pathis the directory where your PHP project is located. -
Domain Nameis used to define the URL associated with the project.

2.2. Configure PHP
If you haven’t installed PHP yet, go to the Install PHP section and follow the steps to install it.
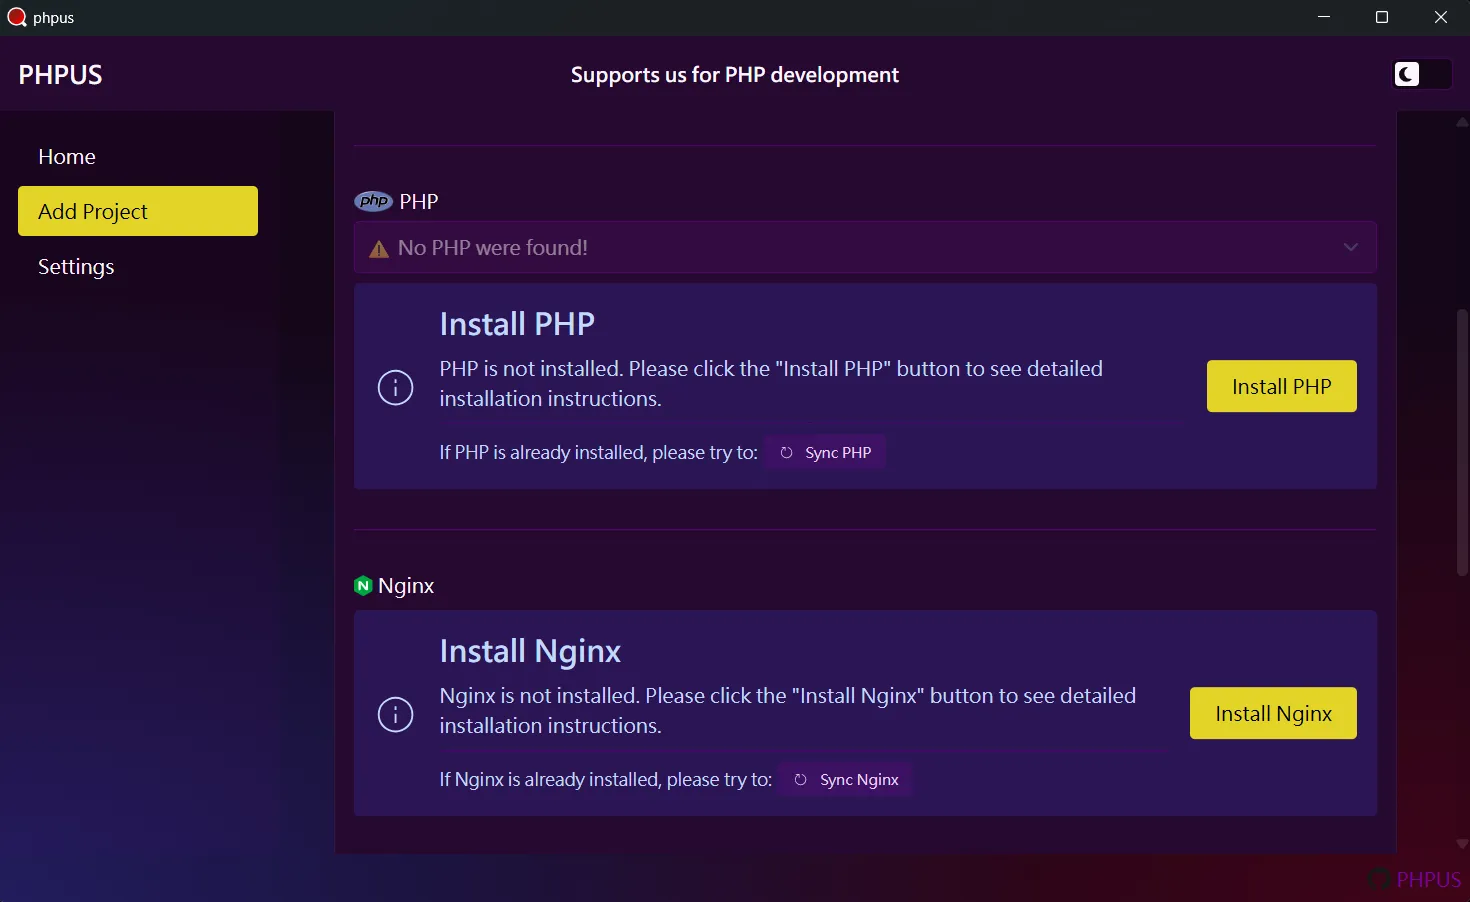
Once PHP is installed, select the version you'd like to use for this project.

2.3. Configure Nginx
If Nginx isn’t installed yet, head to the Install Nginx section and follow the instructions.
After installing, the available Nginx version(s) will appear as shown below:

2.4. Configure Nginx Conf
If your project is based on Laravel, you can simply use
the default template configuration. The template
includes placeholders like
${[variable]}, which will
automatically be replaced with actual values when the
Nginx config file is generated for the project.
2.5. Finish Adding the Project
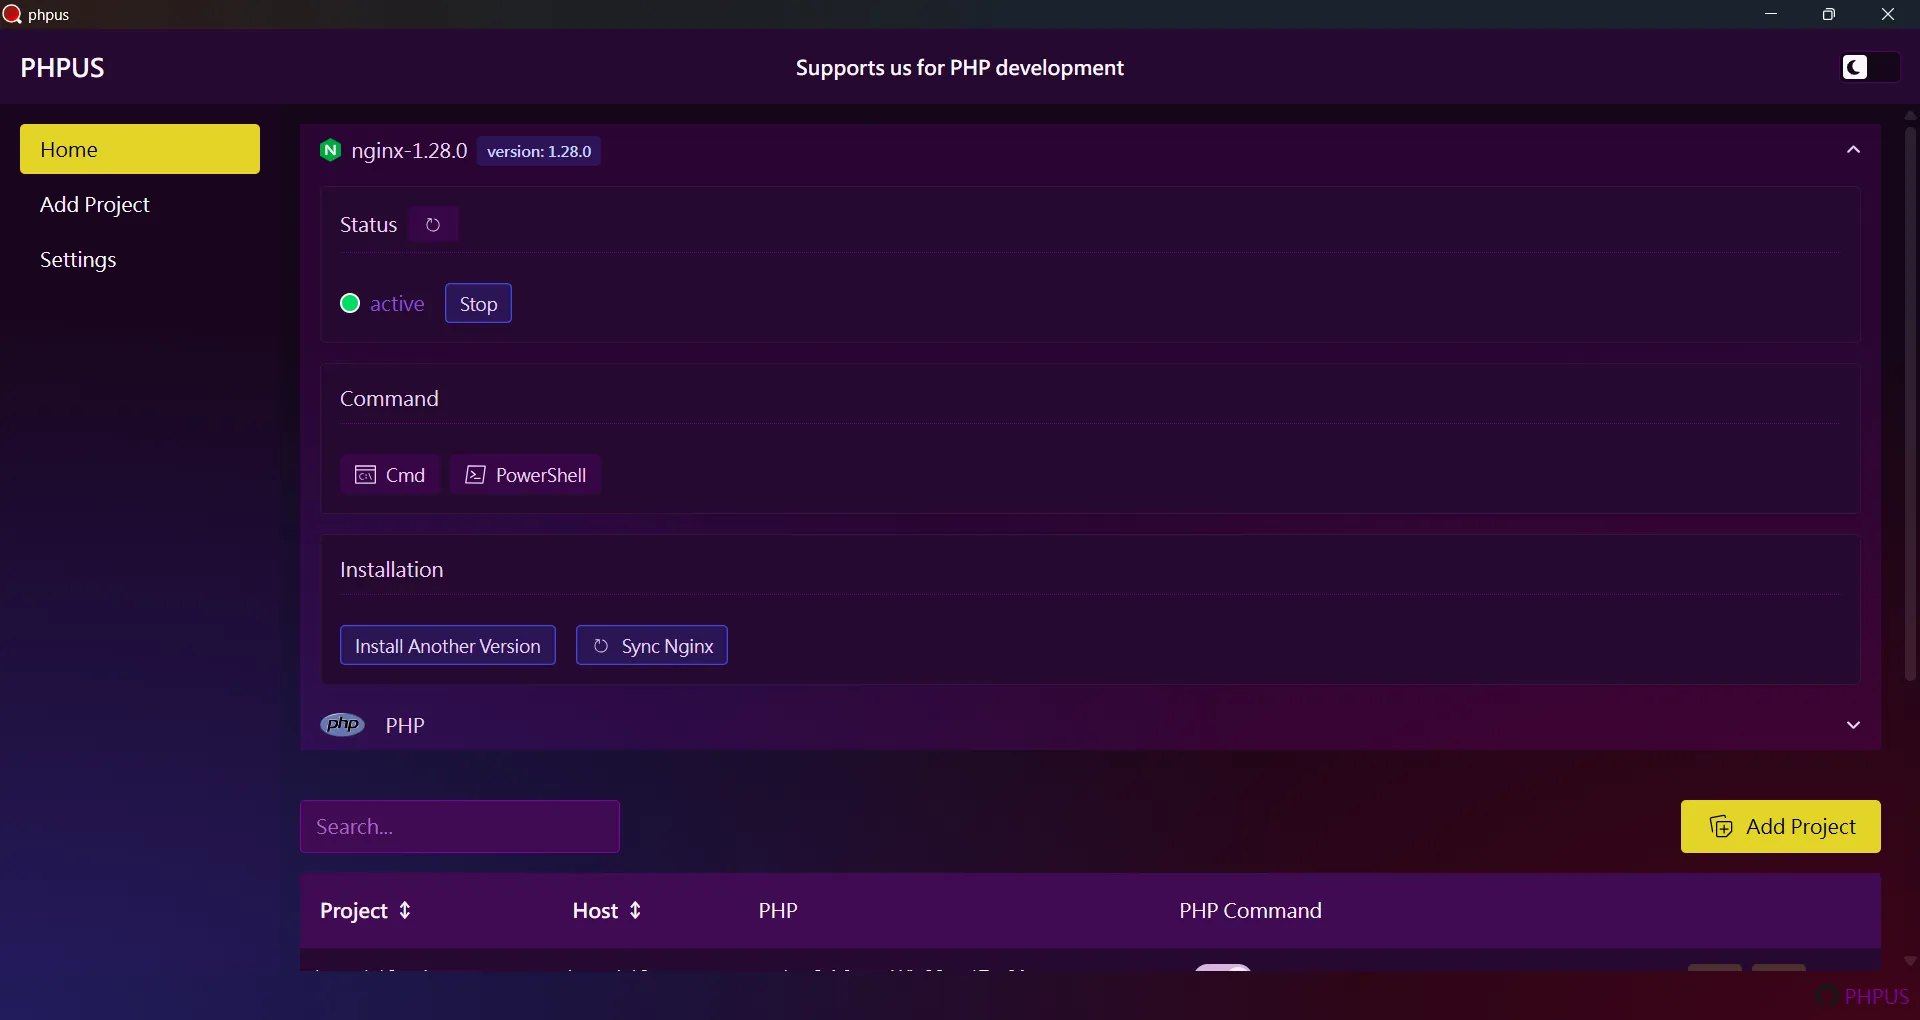
Once you click the Add button, the project will be created successfully. You’ll then be taken back to the home page, where the newly added project will be displayed, as shown below:

3. Installing PHP
If you already know how to install PHP, simply complete the
installation and click the Sync PHP button. If
you need guidance, follow the steps provided by the app. On
the Add Project page, under the PHP section, click
Install PHP or
Install Another Version (if you’ve already
installed a PHP version). Alternatively, you can also find
Install Another Version under the PHP section
on the home page.

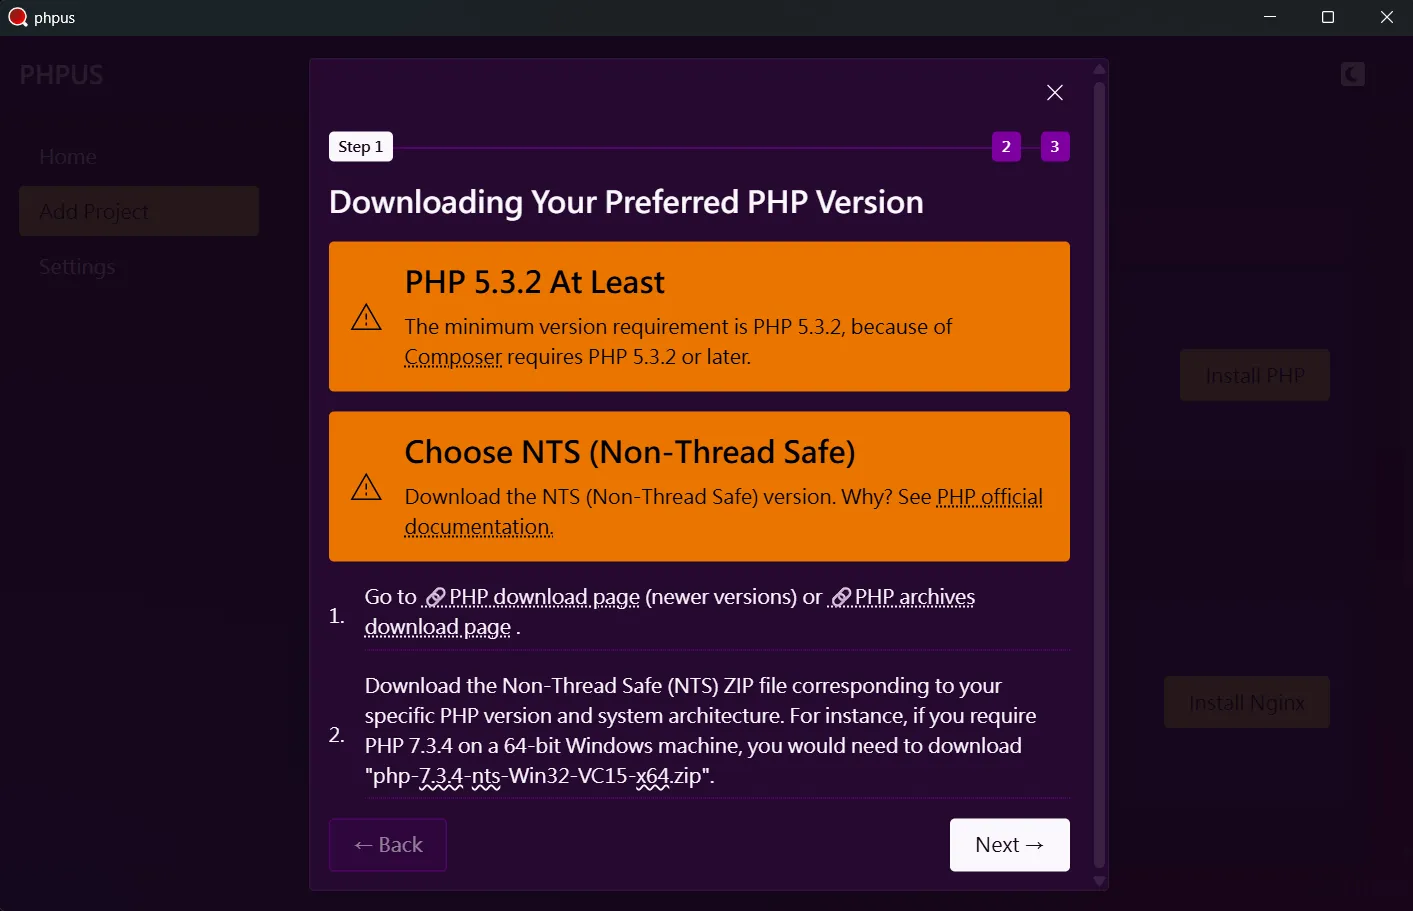
3.1. Step 1 – Download the Required PHP Version
Go to the PHP Archives Download page and download the version you need. In this example, we’re downloading PHP 8.4.6. Since the app connects to PHP via FastCGI through Nginx, make sure to download the NTS (Non-Thread Safe) version.

3.2. Step 2 – Extract the PHP Archive to the Designated Directory
After clicking the Next button in Step 1,
you’ll move to Step 2, as shown below:

Click the php directory button to open the
PHP installation folder:

Now, extract the downloaded PHP archive into the
php directory. After extraction, the folder
structure should look like this:

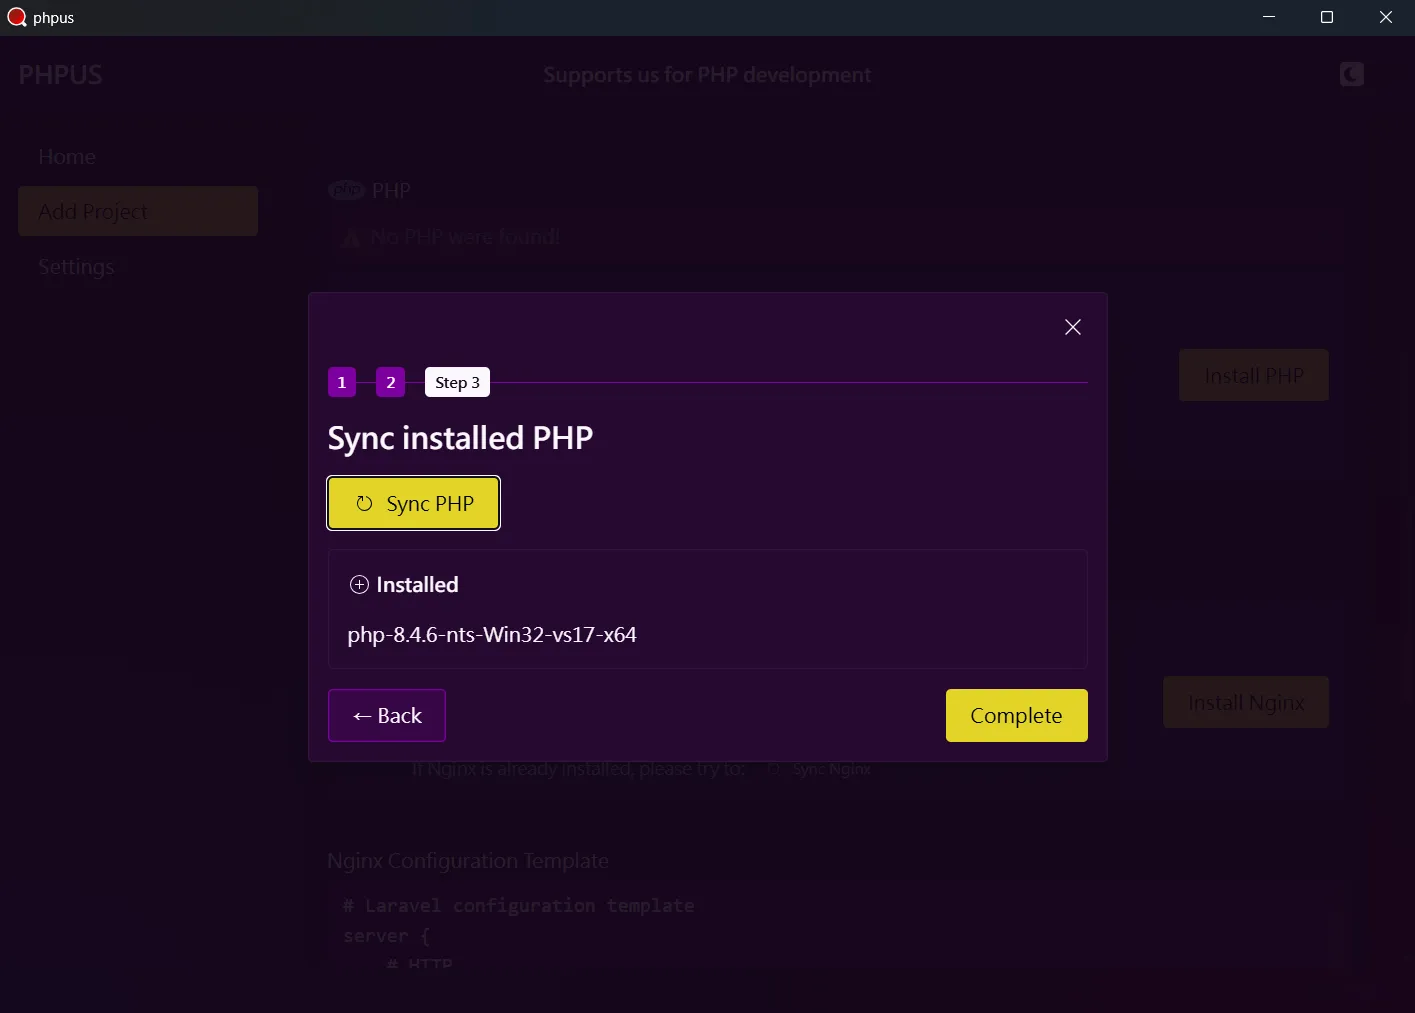
3.3. Step 3 – Sync and Finish Installation
Click Next to proceed to Step 3. At this
point, the newly installed PHP version might not show up
yet:

Click Sync PHP, and the new version should
appear in the list. Finally, click Complete
to close the installation window.
4. Installing Nginx
If you're already familiar with the installation
process, simply install Nginx and click the
Sync Nginx
button afterward.
If you need guidance, follow the built-in steps provided
in the app. On the Add Project page, under the Nginx
section, click Install Nginx or
Install Another Version
(if you've previously installed Nginx). You can also
access Install Another Version from the
Nginx section on the home page.
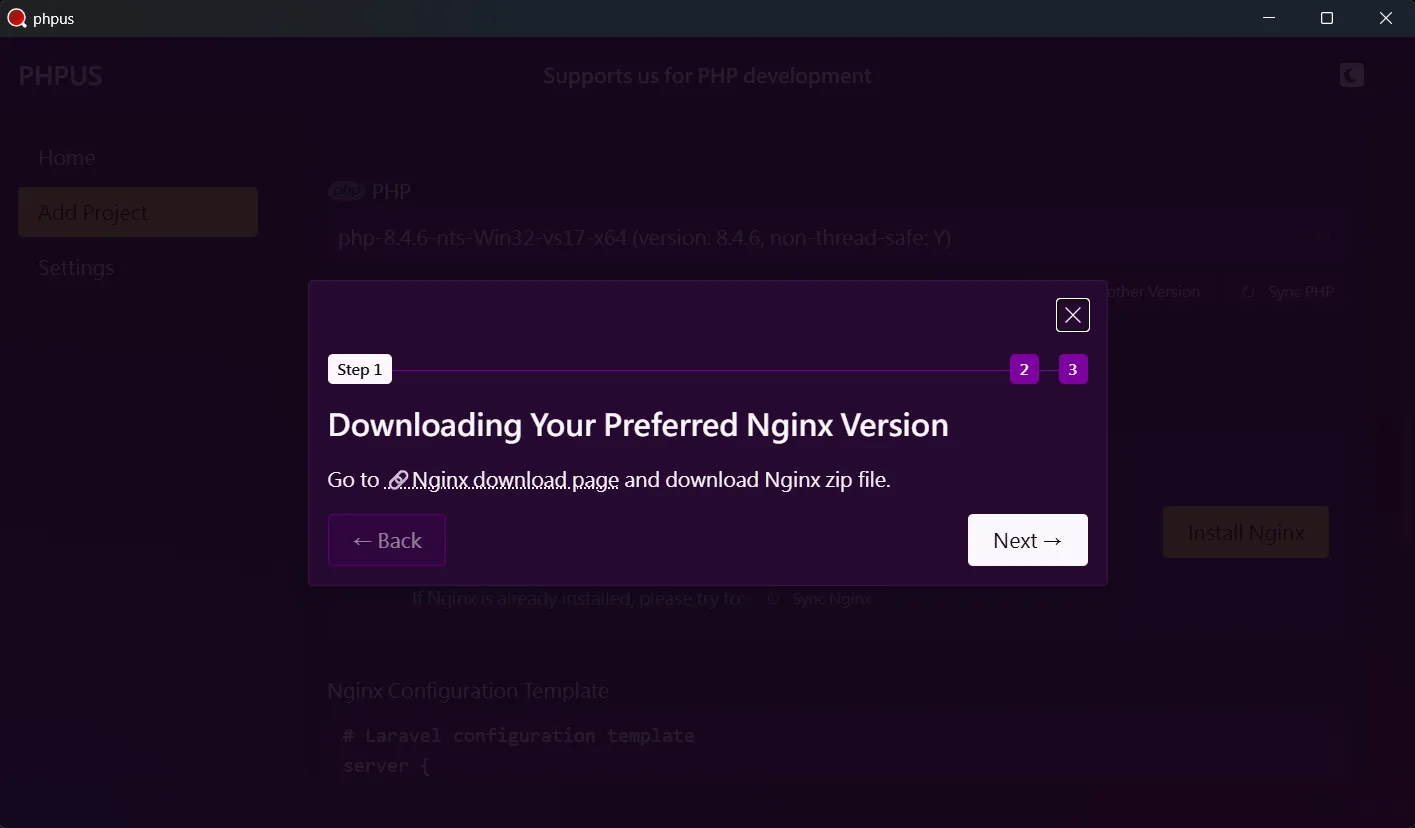
4.1. Step 1 – Download the Required Nginx Version
Visit the Nginx Download page and download the version you need.

4.2. Step 2 – Extract the Nginx Archive to the Target Directory
Click Next after downloading to move to
Step 2:
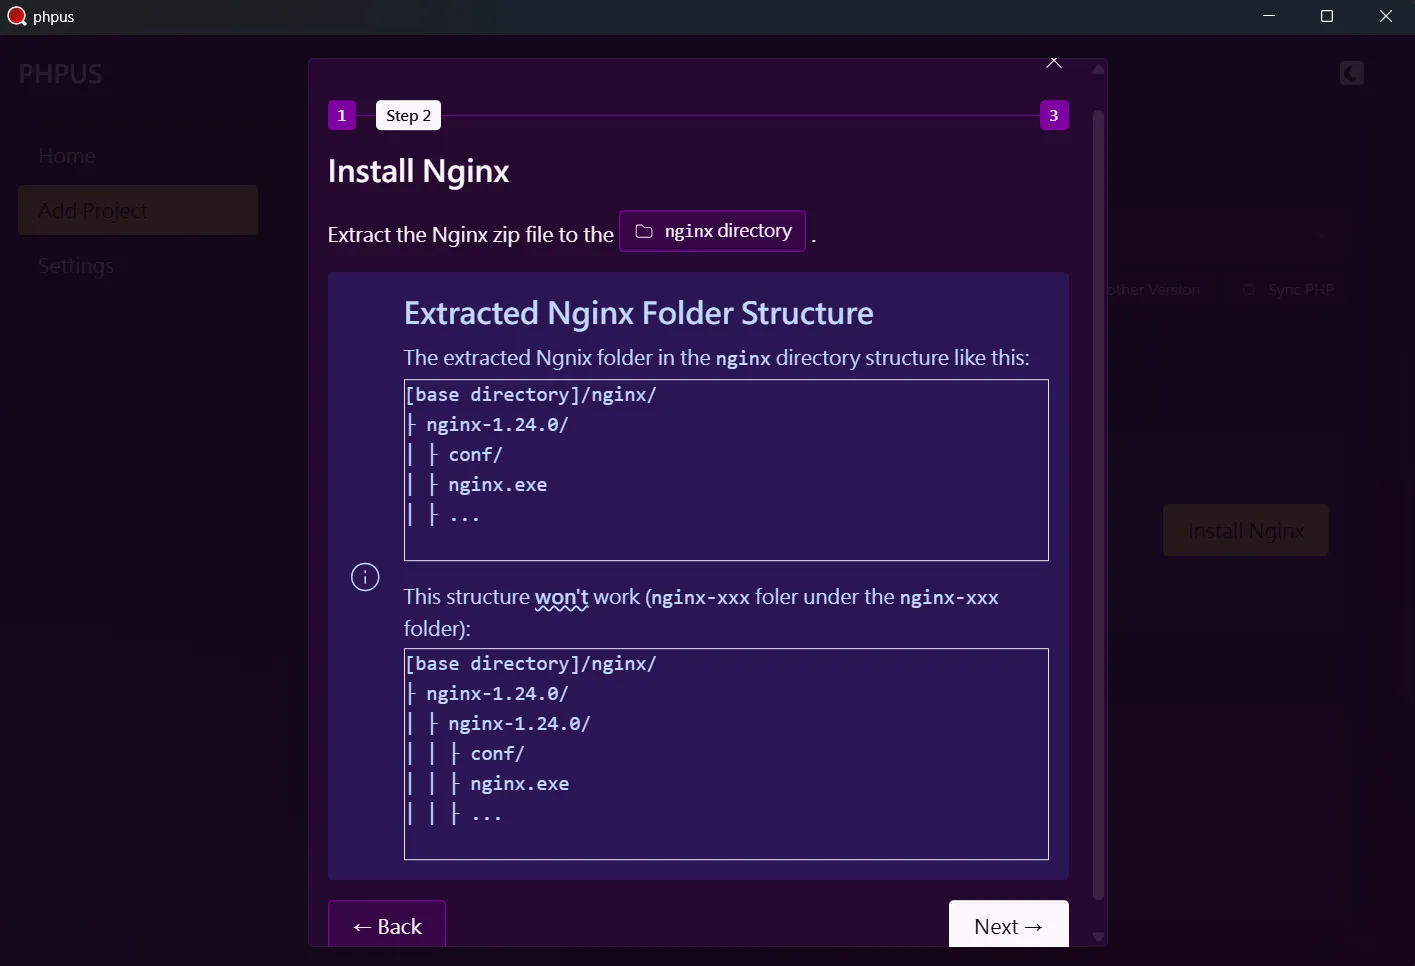
Click the nginx directory button to open
the Nginx installation folder:
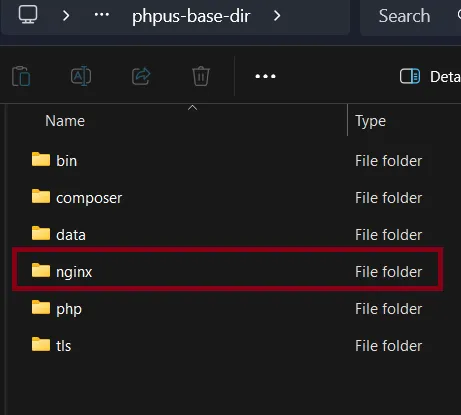
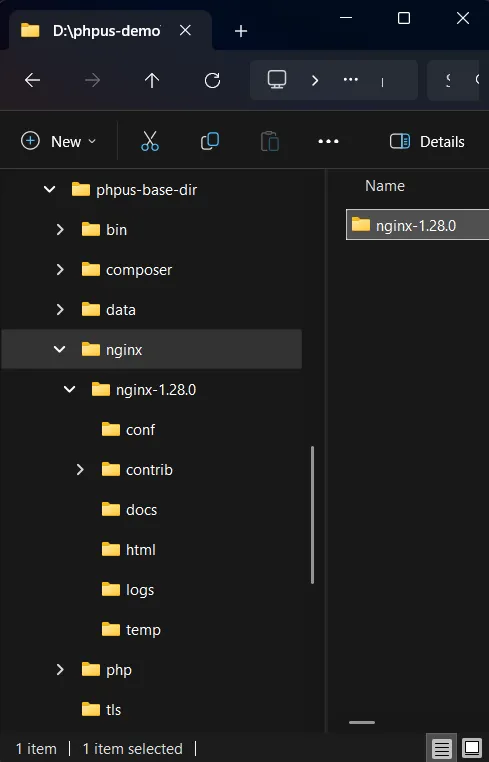
Extract the downloaded archive into this folder.
Note: some Nginx archives may contain an extra parent directory — make sure the final structure looks like this:
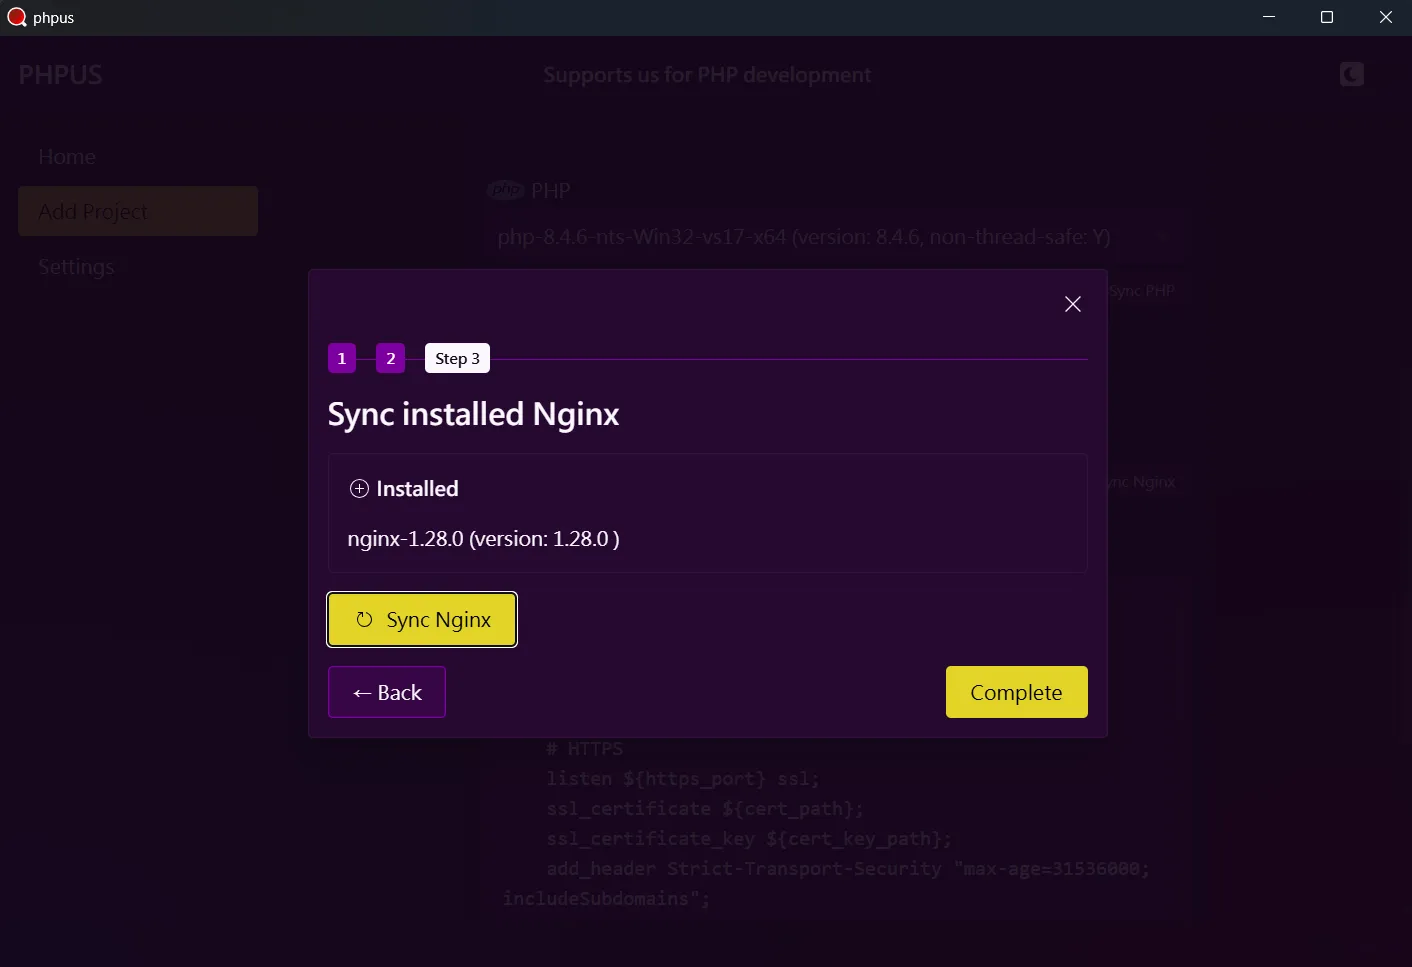
4.3. Step 3 – Sync and Finish Installation
Click Next to move to Step 3. At this
point, you might not see the version you just installed:
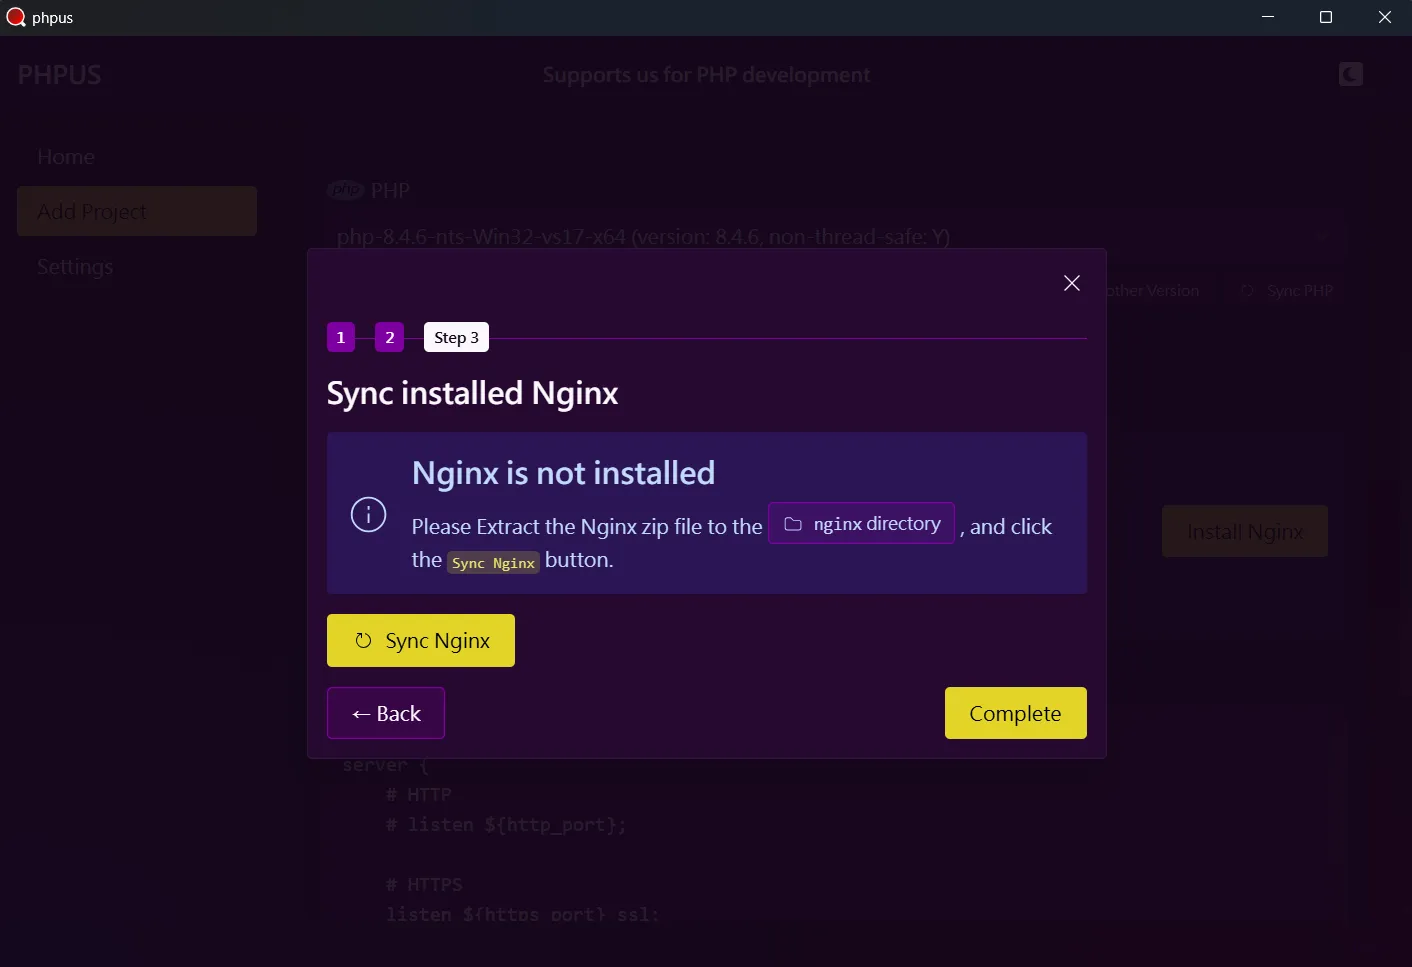
Click the Sync Nginx button, and the newly
installed version should appear. Finally, click
Complete to close the installation window.
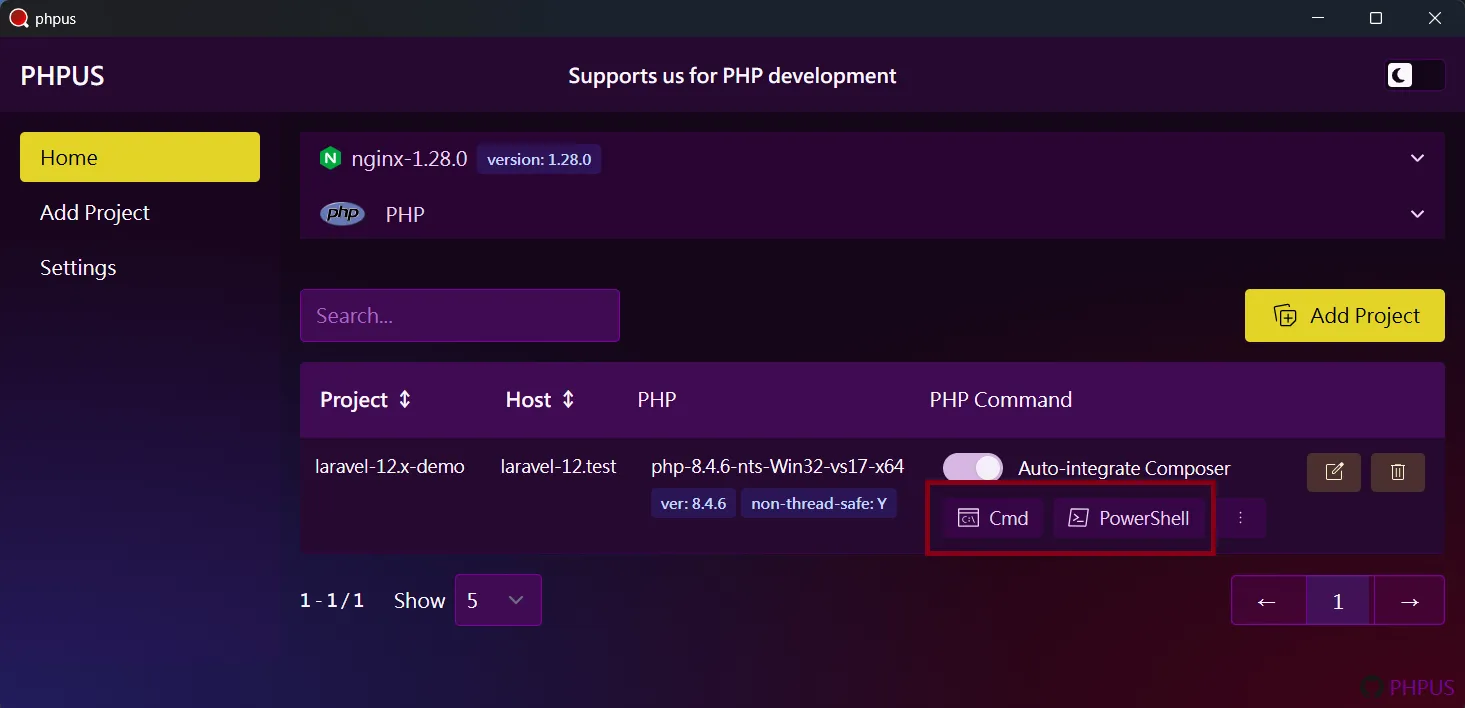
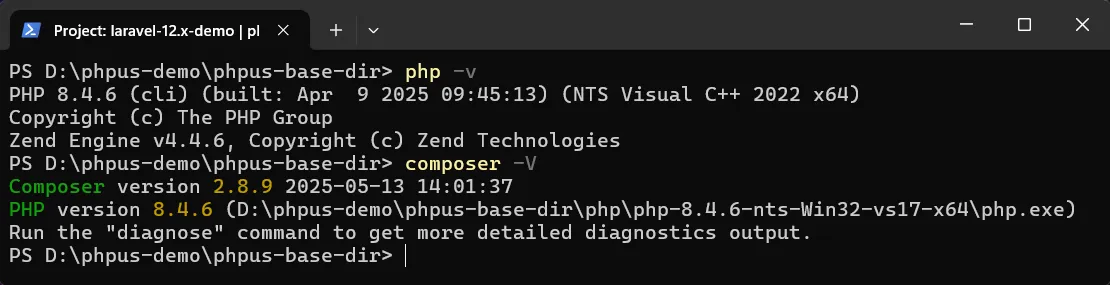
5. Using PHP Commands
You can run PHP commands by clicking Cmd or
PowerShell in the project table on the home
page.

6. Project Configuration
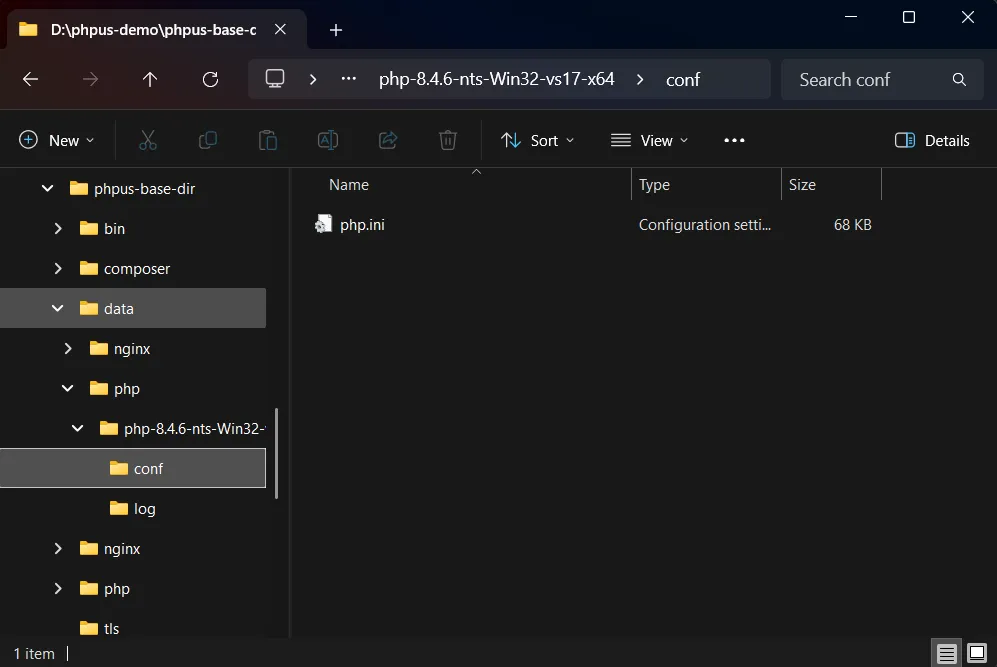
6.1. PHP Configuration
PHP extension files should be placed inside the
ext folder of the installed PHP version.

The php.ini file is located at:
[base dir]/data/php/[PHP version]/conf/php.ini
6.2. Setting Up a Laravel Project
First, on the home page, click Cmd or
PowerShell on the desired project to open a
terminal window. Then use the cd
command to navigate into your project directory.
Copy .env.example to create your
.env file:
copy .env.example .env
Then run: composer install
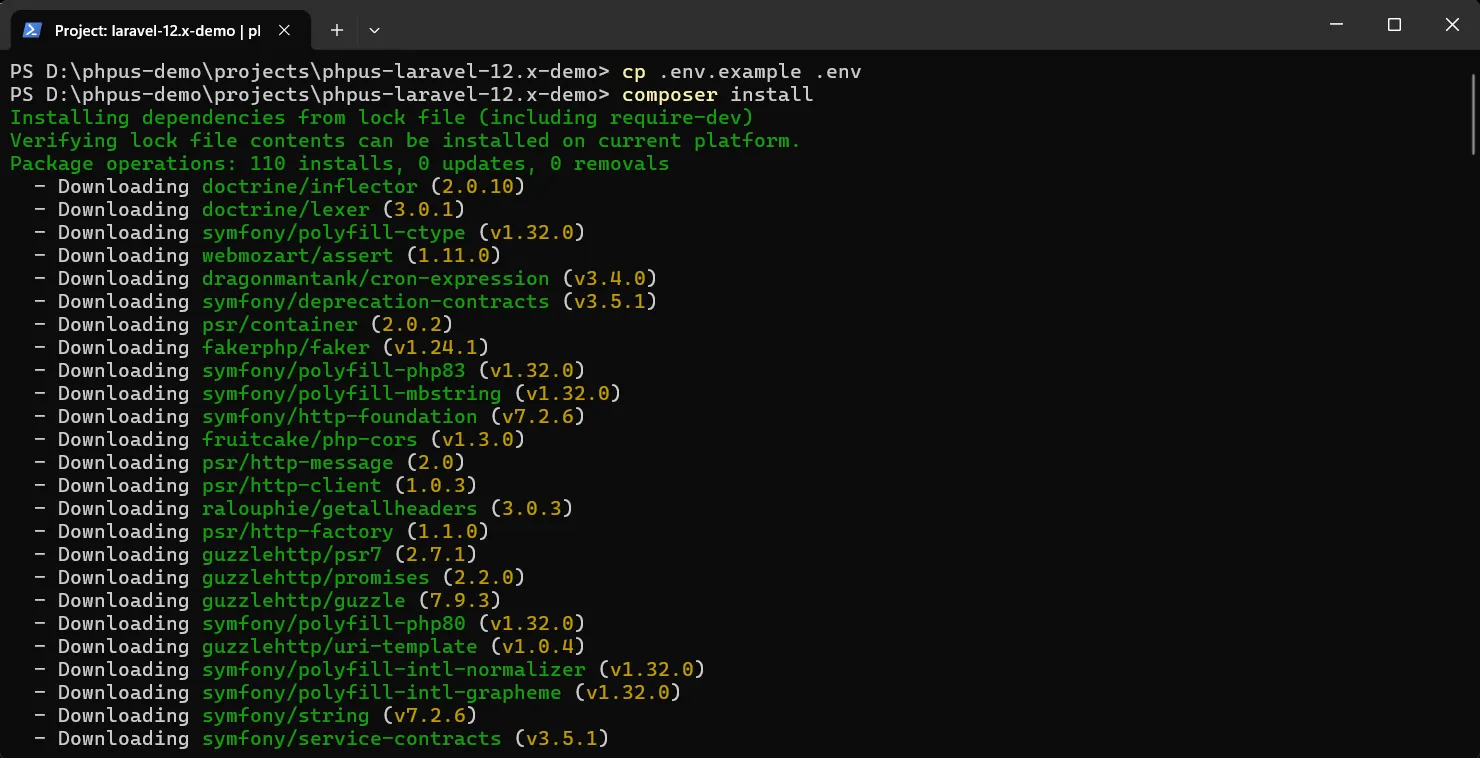
After that, run the following commands:
php artisan key:generate and
php artisan migrate

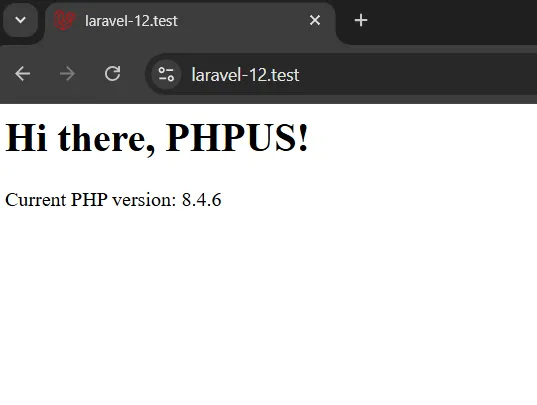
6.3. Launch the Web Page
Open a browser and enter the domain name (host) you configured for the project to verify that it’s working properly.
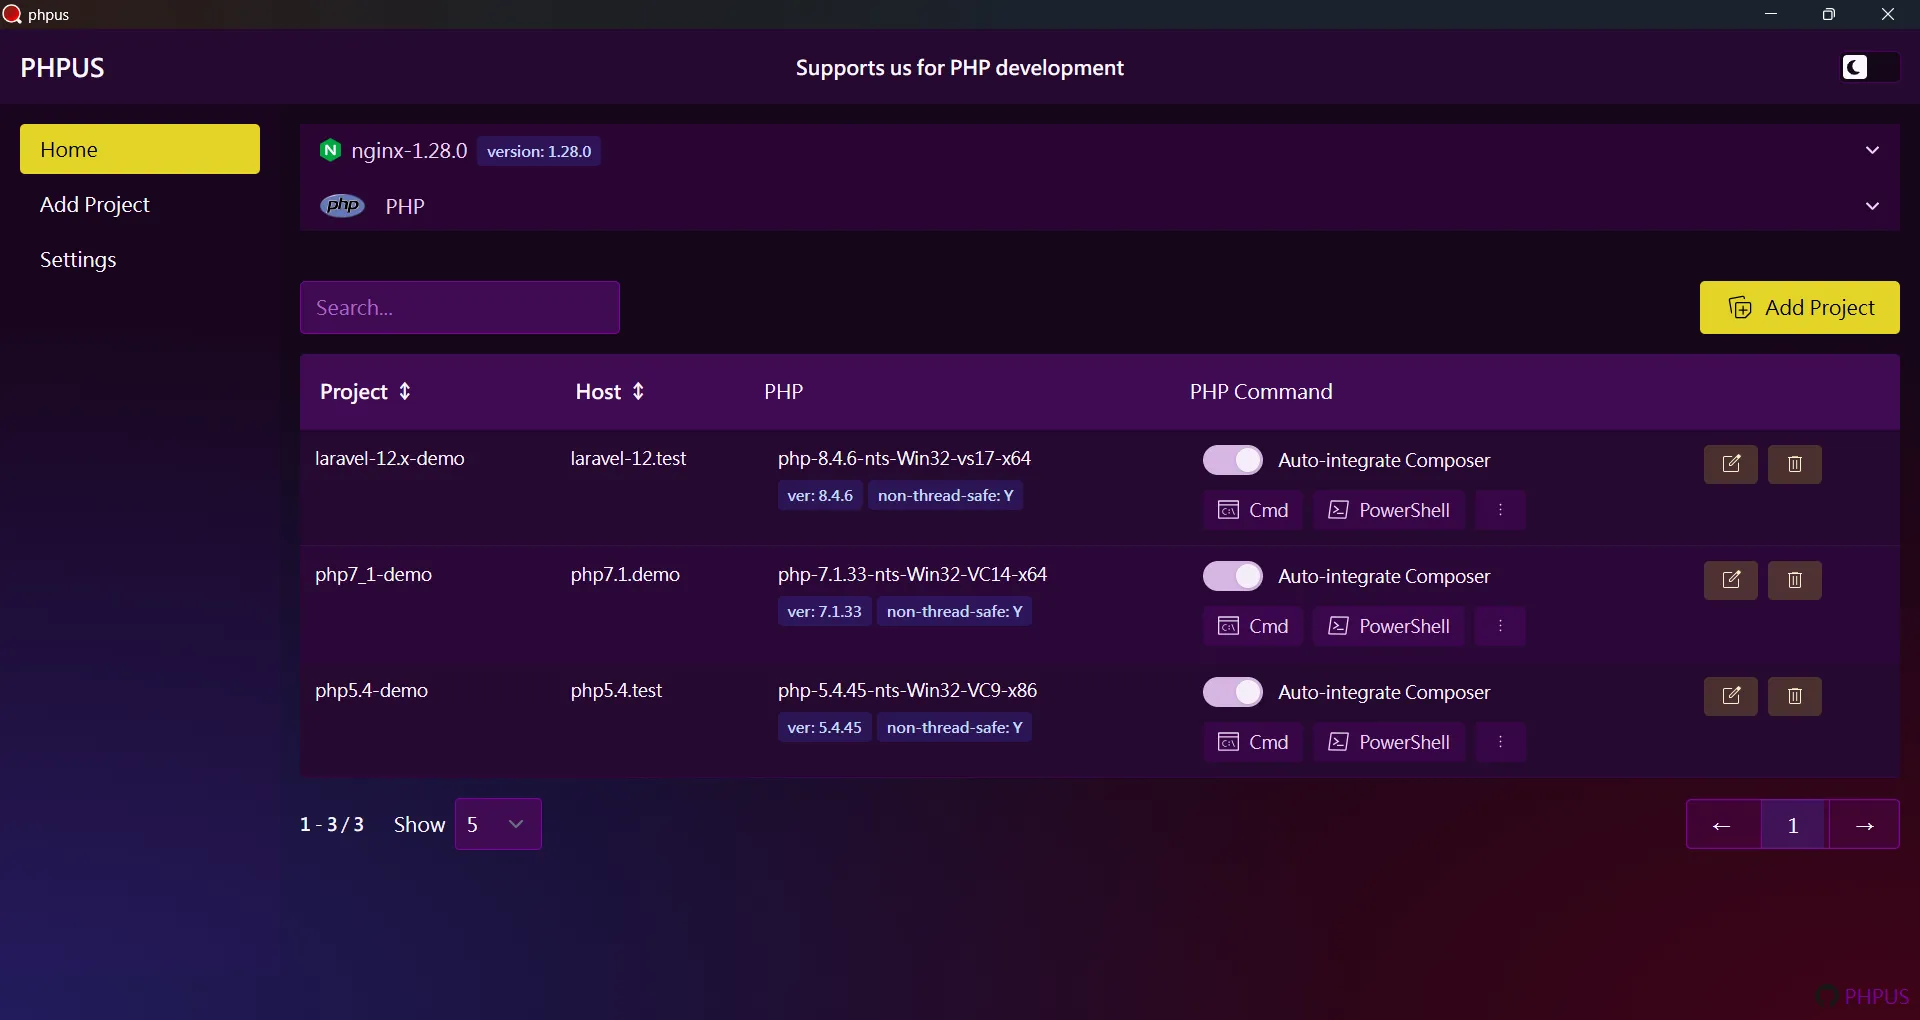
7. Managing Multiple PHP Versions & Adding Another Project
7.1. Add and Configure a New Project
Follow the same steps as before to add a new project. In this example, we're using a repository from GitHub: GitHub - phpus-php7_1-demo , and assigning it to PHP 7.1.
One important note: since this project is plain PHP
(not a Laravel project), make sure to set the
correct root path in the Nginx Conf
section during project setup.

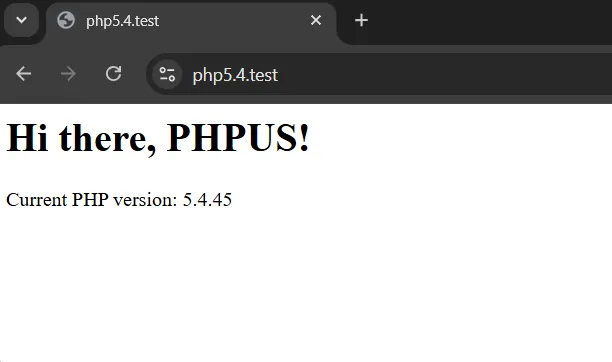
We’ll also use the same phpus-php7_1-demo project again, but this time set it up with PHP 5.4 as a separate project:
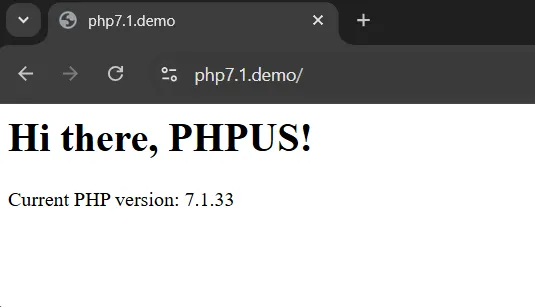
Open both project URLs in the browser to confirm they’re working:
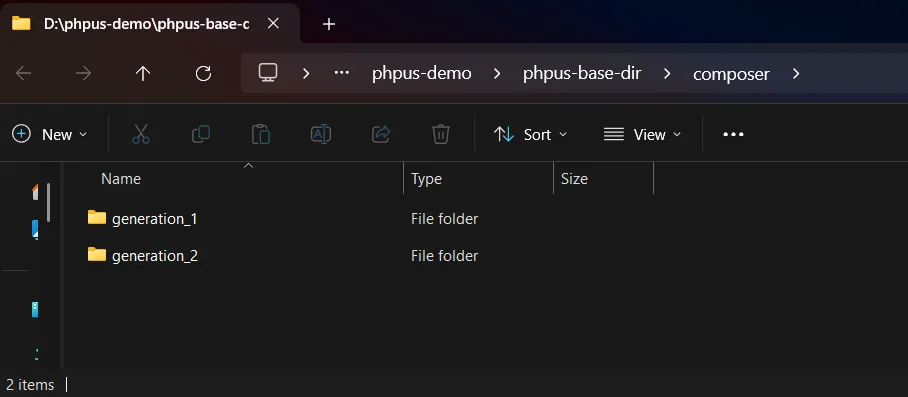
Additionally, under the [base dir]/composer
directory, you’ll see two separate Composer versions
stored: